
 how-to
7 Steps to File Roof Insurance Claims in Rio Rancho
Last Updated: October 25, 2026
Quick Summary
Filing roof insurance claims in Rio Rancho starts with documenting damage from the ground, then reviewing your policy and deductible before you call. Get a professional roof inspection, open the claim with your insurer, and keep a written log of every call and letter.
- Stay off the roof and photograph damage from the ground, including gutters, vents, and downspouts.
- Read your policy first to find your deductible and whether it pays actual cash value or replacement cost value.
- Schedule a professional roof inspection before filing so your claim has a written report behind it.
- Hand the adjuster a one-page damage summary and walk the property with them.
- Keep a log of every call, email, and letter with dates and names.
Table of Contents
- Step 1: Document Roof Damage for Insurance
- Step 2: Review Your Policy Before You File
- Step 3: Arrange a Professional Roof Inspection
- Step 4: Contact Your Insurance Company and Open the Claim
- Step 5: Use This Roof Insurance Claim Checklist
- Step 6: What to Say to a Roof Insurance Adjuster
- Step 7: Understand the Roof Insurance Claim Timeline
- Frequently Asked Questions
Step 1: Document Roof Damage for Insurance
Filing roof insurance claims in Rio Rancho starts with proof, and roof insurance claims are won or lost on documentation. Insurers pay for what they can see, so your first job is to build a clear record of the damage before anything gets moved, patched, or cleaned up.
At FRESH TEC LLC, we tell homeowners the same thing every storm season: document first, repair second.
Photograph and Record Storm Damage Safely
Stay off the roof. Walk the ground and photograph what you can see from below.
- Shoot wide shots of each slope, then close-ups of bruised or lifted shingles
- Photograph dents on gutters, vents, and downspouts, which often show hail damage
- Record short videos panning slowly across each side of the house
Watch out: climbing a wet or damaged roof to get a better angle causes more injuries than the storms themselves. Ground-level photos are enough to start a claim.
Step 2: Review Your Policy Before You File
Read your policy before you call anyone. Two numbers decide whether a claim makes sense: your deductible and your coverage limits.
Find these in your policy documents:
- Your deductible, which is the amount you pay before the insurer pays
- Whether your policy pays actual cash value or replacement cost value
- Exclusions for wear and tear, age, or poor maintenance
If you have coverage or warranty questions, our Frequently Asked Questions page covers how treatment, warranty, and service area work.
Actual Cash Value vs. Replacement Cost Value
Actual cash value pays the depreciated value of your roof, meaning what it is worth today after age and wear. Replacement cost value pays what a new roof of similar quality costs, without subtracting depreciation (Insurance for Your House and Personal Possessions).
The gap matters. A roof halfway through its life might get a small actual cash value payout and nothing more. The same roof under replacement cost coverage pays far more.
Most policies also hold back recoverable depreciation until the work is finished. Ask your insurer to explain this in writing before you sign anything.
Step 3: Arrange a Professional Roof Inspection
A professional inspection turns your ground-level photos into a written record an adjuster can use.
Schedule the inspection before you file if you can. The report gives your claim a foundation and catches damage you would miss from the ground.
You can schedule your free roof inspection with our team and get a written assessment of what the storm left behind.
Step 4: Contact Your Insurance Company and Open the Claim
Call your insurer as soon as the inspection report is in hand. Open the claim, get a claim number, and write down the name of the person you speak with.
Have these ready:
- Your policy number and the date of the storm
- Your inspection report and photos
- A short written summary of the damage
Ask three questions: What is my claim number? Who is my adjuster? What documents do you need from me?
Step 5: Use This Roof Insurance Claim Checklist
A roof insurance claim checklist keeps the process from stalling. Missing documents are the most common reason claims sit for weeks.
| Stage | What to Gather | Why It Matters |
|---|---|---|
| Before filing | Policy, deductible amount, photos, videos | Confirms coverage and starts the record |
| Inspection | Written inspection report, attic photos | Gives the adjuster evidence to review |
| Filing | Claim form, claim number, proof of loss | Opens and formalizes the claim |
| Repairs | Contractor estimates, receipts, invoices | Supports the payout amount |
| Follow-up | Adjuster report, denial or approval letter | Sets up a supplemental claim if needed |
- Photograph and video all visible damage
- Read your policy and note your deductible
- Get a professional inspection report
Step 6: What to Say to a Roof Insurance Adjuster
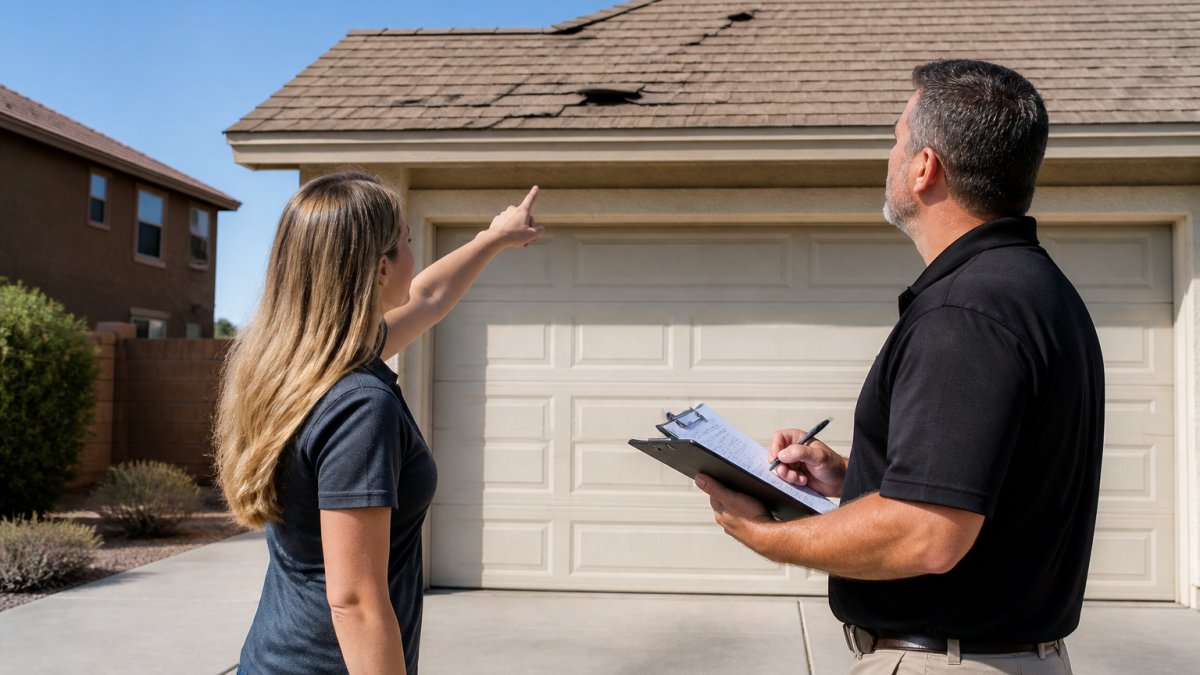
The adjuster visit is the single point where your claim is either documented well or quietly discounted. Most homeowners treat it as a conversation.
What the Adjuster Is Actually Doing
A property adjuster is assigned by the insurer to inspect the loss, apply your policy terms, and produce a scope of damage and an estimate. They are typically working from a standardized estimating platform and a set of carrier guidelines, and they may handle dozens of storm claims in the same week.
Two things follow from that:
- The adjuster documents what you show them. Damage you do not point out is easy to miss on a quick walk.
- The adjuster applies policy language, not construction judgment. If your policy excludes a cause of loss or applies depreciation, the adjuster's hands are tied regardless of how obvious the damage is.
Your contractor's inspection report and the adjuster's scope are two different documents. The contractor describes condition and repair scope; the adjuster decides coverage. Keeping that distinction clear prevents arguments that go nowhere.
Prepare a One-Page Damage Summary
Before the adjuster arrives, put a single page in front of them. It shortens the visit and anchors the conversation.
- Date and approximate time of the storm, and the weather event as you observed it
- A list of each roof slope and what you observed on it
- Photos numbered and labeled by location (for example, "north slope, lifted ridge shingles")
Hand over a copy and keep the original. Ask the adjuster to note in their file that they received it.
Walk the Property With the Adjuster
Go with them. Point at specific conditions rather than describing them in general terms.
- Show soft spots, granule loss, bruised shingles, and lifted or creased tabs
- Point out dented gutters, downspouts, vents, and any metal soft metals on the roof
- Show attic staining and any daylight visible through the roof deck
Say what happened, when it happened, and what you observed. Do not guess at causes, do not speculate about cost, and do not sign anything on the spot.
Questions to Ask Before the Adjuster Leaves
- What is the scope you are documenting today, and will I receive a copy of the estimate?
- Are you treating any of this as pre-existing or excluded, and on what policy language?
- What is the next step and the expected timeline for the written decision?
Write the answers down in your claim log with the date. If the adjuster's written estimate later differs from what was discussed on site, your notes are the record.
After the Visit
Request the adjuster's written estimate and review it line by line against your contractor's report. Look for missing line items (decking replacement, ice and water barrier, flashing, ridge vent), quantity differences, and code-required items your jurisdiction may require on a full replacement. Discrepancies are normal and are handled through a supplement, not an argument. Send the contractor's line-item estimate and photos to the adjuster in writing and ask for a re-review of the specific lines in dispute.
Step 7: Understand the Roof Insurance Claim Timeline
Most claims move through five stages: filing, adjuster inspection, estimate review, approval or denial, and payment. Each stage can take days or weeks depending on the insurer and the size of the claim. What matters more than the calendar is the paper trail you build at each stage, because that record is what carries a claim through a dispute.
Keep a log of every call, email, and letter. Note the date, the name of the person you spoke with, and what was said. If the timeline stalls, ask for a written status update rather than a verbal one.
What Each Stage Should Produce
| Stage | What You Should Receive | What to Check |
|---|---|---|
| Filing | Claim number and assigned adjuster | Name, phone, and email in writing |
| Adjuster inspection | Written scope and estimate | Line items, quantities, and exclusions |
| Estimate review | Coverage decision letter | Actual cash value vs. replacement cost treatment |
| Approval or denial | Payment or written denial | Reason cited and policy language referenced |
| Payment | Check or draft, and recoverable depreciation release | Whether depreciation is held back until work is complete |
If your policy pays replacement cost, expect an initial payment at actual cash value with recoverable depreciation released after the work is finished and invoiced. Ask the insurer in writing what documentation they need to release the withheld amount, so you are not surprised at the end of the job.
When a Claim Is Denied or Underpaid
A denial is not the end, and a low offer is not final.
Read the denial letter closely. It should identify the policy language relied on and the reason for the decision.
Compare estimates line by line. Put the adjuster's estimate and your contractor's estimate side by side.
Ask for reconsideration in writing. Summarize the disputed items, attach the supporting documents, and request a written response.
If the offer comes in low, compare the adjuster's estimate with your contractor's estimate line by line. If the claim is denied outright, you may need to weigh repair against replacement, and our guide to roof repair vs. replacement walks through when each makes sense.
Frequently Asked Questions
How long do I have to file roof insurance claims for storm damage?
New Mexico homeowners policies typically require prompt notice of a loss, and many set a one-year contractual deadline to file suit if a claim is disputed, though terms vary by insurer. Do not wait to find out: report damage as soon as you notice it, document everything with photos, and request a written copy of your policy's notice and proof-of-loss provisions. Delays can give an insurer grounds to reduce or deny a claim, so treat the first few days after a storm as the critical window.
Will my insurance premium go up if I file a roof claim?
It can. Insurers weigh claim history when setting rates, and a weather-related roof claim may affect your premium at renewal, though the impact varies by carrier and by whether the damage is classified as a catastrophic storm event. Before filing, compare the deductible and the likely repair estimate. If the damage is minor and close to your deductible, paying out of pocket may cost less over time. Ask your agent directly how a claim would be treated on your specific policy.
Can I choose my own roofing contractor for an insurance claim?
Yes. You are not required to use a contractor recommended by your insurer, and in practice you should get your own written repair or replacement estimate. A local contractor's inspection report, photos, and itemized estimate give you independent documentation to compare against the adjuster's scope. Keep every receipt for temporary repairs and mitigation, since those costs are often reimbursable under the policy.
What should I avoid saying to a roof insurance adjuster?
Avoid guessing at causes, timelines, or prior condition. Do not say the roof was already worn, that you are unsure when the damage happened, or that you have not looked at the roof in years. Stick to facts you can support with photos and dates, point to the documented damage, and refer questions about coverage to your policy. If you are unsure of an answer, say you will check and follow up in writing rather than speculating on the spot.
Filing roof insurance claims takes patience, paperwork, and a clear record of the damage. FRESH TEC LLC helps homeowners, realtors, and property managers in Albuquerque and Rio Rancho protect their roofs with plant-based GreenSoy™ Technology, a 6-year warranty, and a free on-site inspection that most jobs finish in about an hour. Get started with FRESH TEC LLC and turn a stressful claim into a documented, confident next step.